Making Table Tortillas from Kernel to Masa
Making Table Tortillas from Kernel to Masa
June 14, 2021
At Masienda, cooking from kernel to masa is truly the approach that permeates all layers of our work. It’s a process that dates back millenia to the indigenous cultures of Mesoamerica wherein dough (masa) is made from nixtamalized corn kernels (the hard, field corn kind), and into some of your favorite treats you know today, like tortillas, sopes, tamales, tetelas, tlayudas, tlacoyos…
With so many dishes, it’s hard to not start sounding like Bubba from Forest Gump, but you get the idea. There are dozens upon dozens of masa shapes (check out our YouTube series here for just a sampling), and we will be covering the steps on how to make masa that will get you to each and every one of them.
Of course, masa harina, or masa flour, is a common and convenient way to get to your desired masa shapes when you’re short on time. In case you’re not familiar, masa harina is pre-made masa that has been dehydrated for shelf stability. To prepare, just add water and, buen provecho, masa is served. Here at Masienda, we make a special masa harina that’s nixtamalized, finely ground and slowly dried to preserve its natural aromas and flavors.
That said, if we go back to the roots of certain masa shapes, some recipes benefit from a slightly different treatment of the corn or a different grind, for example, which is not possible to adjust with masa harina. All of this is to say, masa harina is great, BUT, to take your masa shapes to the next level, you’ll want full control of the entire kernel-to-masa process.
The Kernel-to-Masa Process
When it comes to preparing masa, we find it helpful to think of brewing coffee. If you’ve prepared a cup of coffee before, you likely know that there are countless ways to get to that final cup of joe, whether from pour over, french press, aero press, espresso…the list goes on. Each preparation varies slightly in execution and final outcome but ultimately leads to coffee in some form. As our friends at Counter Culture—one of the early pioneers of gourmet, third-wave coffee—teach their aspiring barista students, brewing good coffee is all about knowing the variables and adjusting them to suit your definition of delicious. Making masa is the same deal, and, together, we’ll cover just what those variables are.
To take corn from kernel to masa, there are six key steps to follow:
- Precooking
- Cooking with Cal
- Nixtamalization
- Nixtamal rinsing
- Nixtamal Grinding
- Masa Mixing
What comes next is a longer-form explanation of each step and the variables they consist of. If, however, you would like to jump to the shorter printable recipe, feel free to skip ahead! Questions? Let us know in the comments and we can go further into any aspect of the process.
1. Precooking
While it might not sound like a step, precooking certainly is one. You wouldn’t just build a house without a blueprint, right? Neither should you begin cooking without a plan. For best results, you’ll want to begin with the end in mind and work backwards to get there. Do you want dry or wet masa? Will you be shaping tortillas for frying tostadas or for soft tacos? Are you aiming for tamales? Your choice will inform the journey.
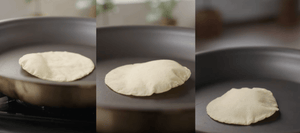
In the below steps, we’ll be specifically addressing how to make a table tortilla masa--that is, the kind of masa you would use for table tortillas. Table tortillas are the kind of tortillas that are soft, pliable, and passed around the table and/or assembled into a taco. (They are the ones that puff when cooked!) Just know, however, that each of the steps can be manipulated, if a table tortilla masa is not exactly what you are looking for.
In the precooking step, we’ll also want to consider the starting ingredient itself. Not all corn is created equal, and so the process can slightly vary across varietals, from cooking time to rinsing. For example, the moisture content of the corn will directly affect the cooking time, as will its unique starch content. It’s therefore important to give some thought to what you’re working with before you dive in. At the very least, it helps to be open to the fact that some variation is to be expected across corn varietals.
2. Cooking with Cal
Cooking with cal (slaked lime) is both a precursor to, and an integral part of, nixtamalization. In short, the cook helps achieve the following:
1) Makes the corn palatable by breaking down the corn’s natural starches and proteins.
2) Makes the corn taste really good. Like salt or butter, the right amount of cal develops the organoleptic qualities of the corn. It amplifies the corn’s flavor, which has an umami-like quality, and also brings the aroma to a whole new level.
3) Sets the mood for nixtamalization: our cooking heat increases the caustic action of calcium hydroxide, which, in turn, begins to break down the corn for our culinary needs.
For a bulletproof cal to corn ratio, we recommend using 1% of cal for the weight of your corn. For example, 1 lb (16 oz) of corn would take 0.16 oz of cal.
3. Nixtamalization
Nixtamalization technically encompasses the whole process of cooking and steeping the corn in an alkaline solution, but here we’re referring to it as the standalone steeping step where its alchemy is fully realized. After cooking the corn in the alkaline solution, you’ll need to let it soak (after removing it from heat) for 6-12 hours in order for nixtamalization to fully take place.
This process activates the corn’s otherwise locked vitamin B3, or niacin, and the cal (calcium hydroxide) fortifies the corn with calcium. Additionally, nixtamalization breaks down the cell walls of the kernel, making a cohesive masa possible, once ground.
For this step, there’s not much to do here but sit back, relax, and let science do its thing.
4. Nixtamal rinsing
Through rinsing and agitating the nixtamalized kernels (now called nixtamal), you are controlling how much or little of the nixtamal’s skins will end up in your masa. The purpose of rinsing is for:
1) Texture/elasticity control (more skins = more masa elasticity)
2) Color (more skins = more yellow masa color)
3) Milling efficiency (less skins = faster grind time)
Generally speaking, you don’t want to remove all of the skins, since they help bind the masa into a workable mass and help ensure the flexibility/pliability of the resulting tortillas. For those just starting out, we suggest using a a 50% wash-off rate--that is, the amount of skins you aim to rinse off and discard. From there, you can adjust to your preference.
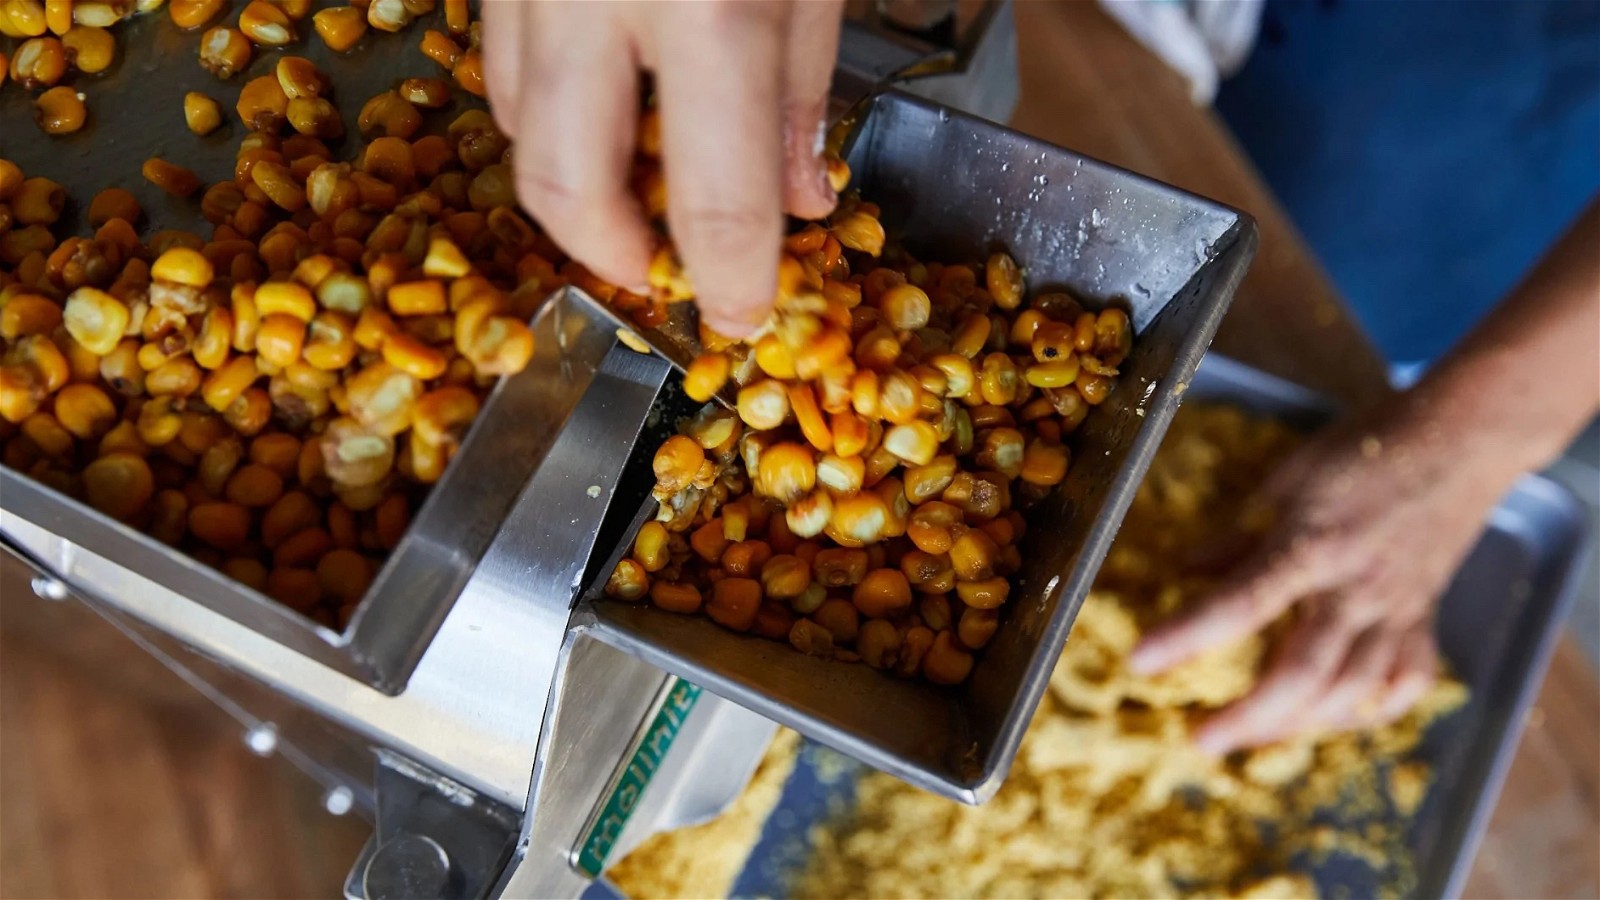
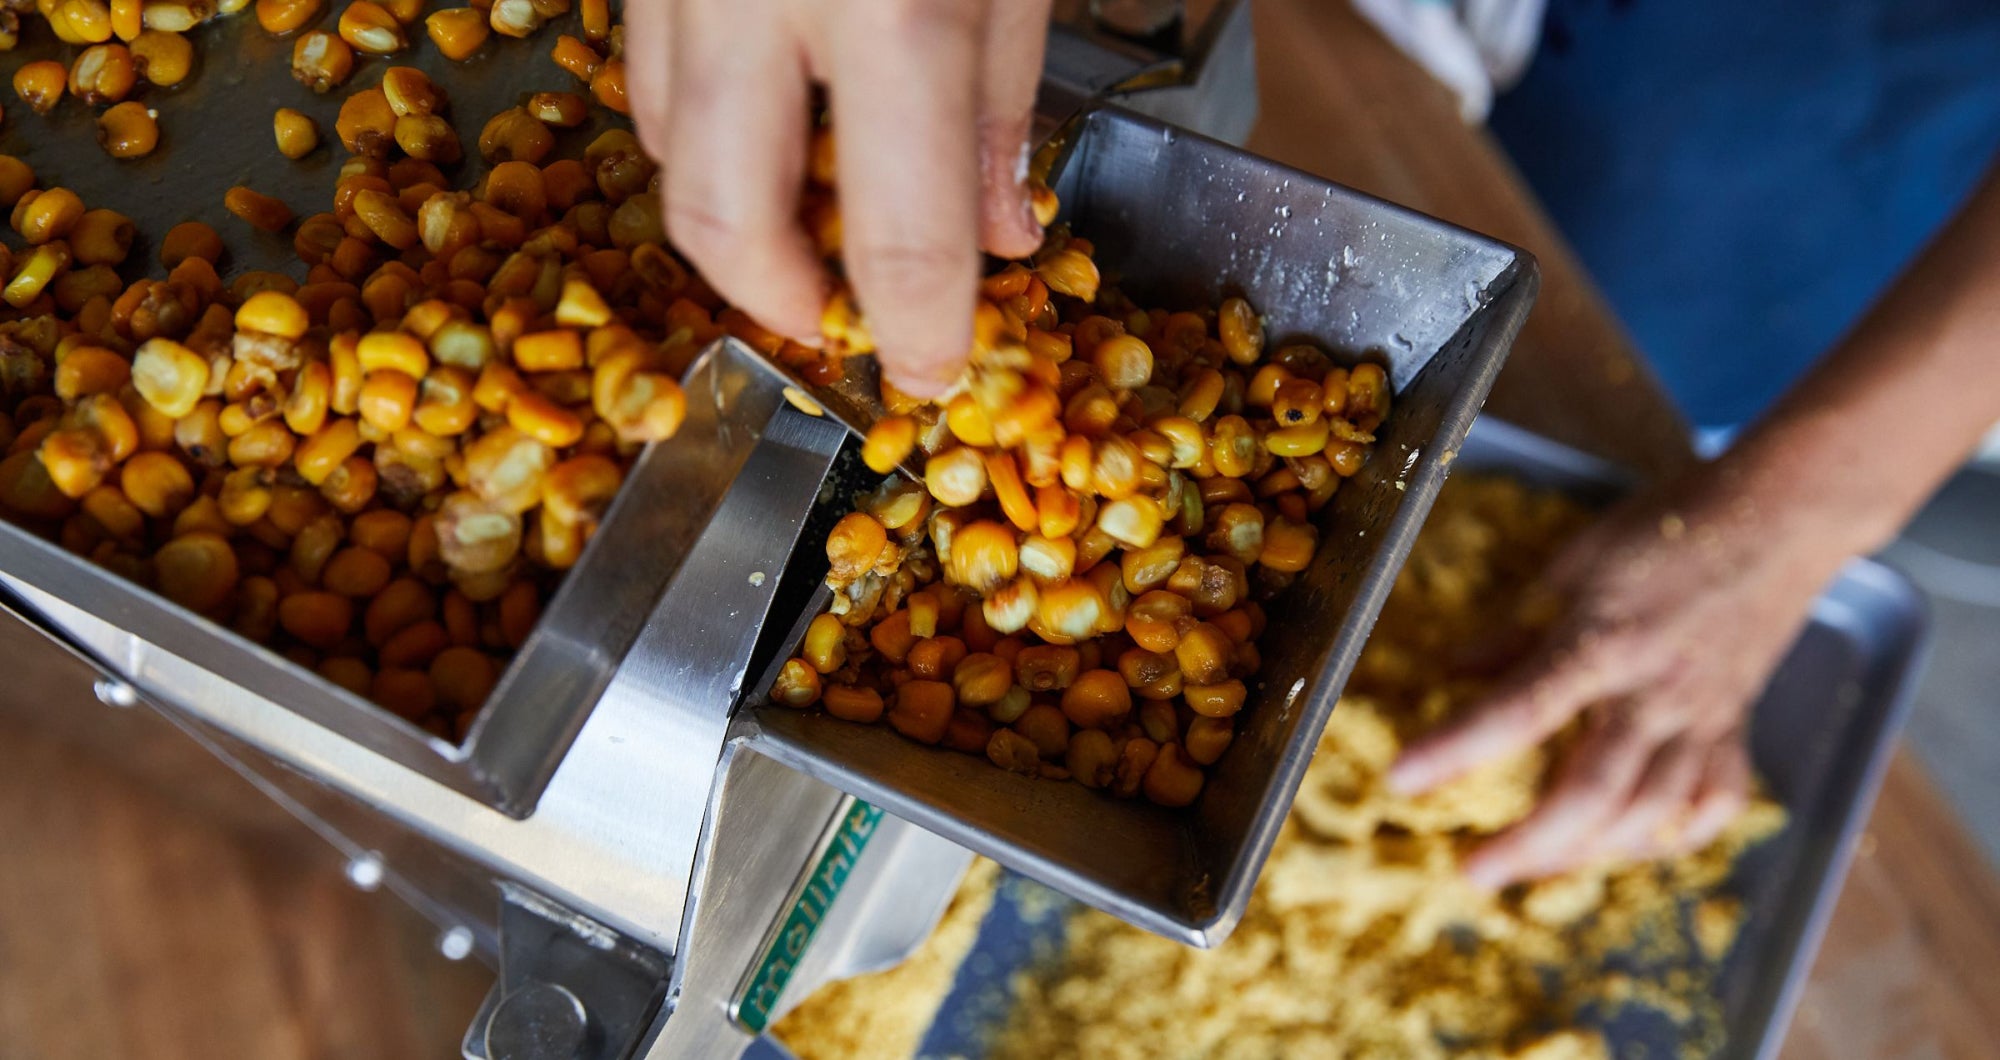
5. Nixtamal grinding
Grinding nixtamal into masa can be achieved in a number of ways. Our preference for grinding is a traditional molino, an electric machine that uses two basalt stones to grind the nixtamal into a soft dough. Think a metate, but electrified. Typically molinos have been large, industrial machines, but now that Molinito exists, masa is now easily achievable at home and restaurant kitchens. (For scale reference, Molinito is comparable in size to a standing mixer.)
No Molinito? No problem. To get the job done, we suggest using either a Masa Hand Mill (and a little arm strength), or a food processor.
For table tortillas, you’re looking for a fine grind, no matter the tool. You want a cohesive dough where you don’t quite feel the grains when rubbing the finished masa between your fingers--think of the texture of Play-Doh. This may take some adjustments, depending on your method, but you will get there, #tortillapuff included.
6. Masa mixing
After the grind is complete, masa mixing is important to ensure an even and consistent texture in the masa. We recommend mixing the masa for 3-5 minutes by hand or with an electric standing mixer using a dough hook.
Since we’re looking for masa that’s wet but not sticky, you can also use this step to add additional moisture by slowly trickling water into the masa as it's being mixed. Too much water will make it tacky, sticking to your fingers in large chunks. If your masa is too tacky without adding water (perhaps because your nixtamal is overcooked or because you went heavy on the water during the milling process), don’t worry - you can correct this! You can let the masa dry out for a bit or mix in some dry masa harina, if short on time.
The masa mixing step is where you’ll want to add any optional spices, colors, or seasoning to your masa, though this is optional and completely up to you!
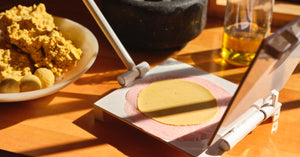
Once you’ve gone from kernel to masa, your masa is ready to be rolled into golf ball sized balls, pressed into tortillas, and cooked. Read our full recipe below on how exactly to go from kernel to masa (and tortilla), including measurements.